It’s September. The leaves are changing. The air is crisp. The fire is warm. You are greeted by the smell of pumpkin everywhere you go. Ahhh. But, if you live in Southern California you know that it is still in the 90’s, your boots are covered in dust, and your sweaters have been thrown to the top shelf to free up hanger space. The struggle is real. I can’t let fall go though. I typically go to Seattle, New York, or San Fran to get my much needed fall fix, but until then I’ll just show you pretty pictures taken by Katie Boink that will inspire you to embrace how little, or how much fall you experience this year!
Now, I hear a lot of people talking about how in (or not in) overalls are. I, for one, am team overalls. There are comfortable. They are effortless. They are back my friends. I love to wear them with striped shirts, plain tee’s, lacey numbers, or even the occasion crop top if I’m feeling a little risky. (Ok no, I haven’t worn them with a crop top, but they do look really cute with them if that’s your thing!) Birks are also back in. I remember a couple years ago my friend said they were making a come back after she saw some Free People models rocking them, and I remember saying “ugh no, they are not coming back.” Welp I was wrong, they are back, and I wear a couple different mock ones, which I think are cuter than the real ones. BUT what about wearing these sandals with socks??!! Are you on board? I am not yet convinced, but let me tell you they were darn comfy.

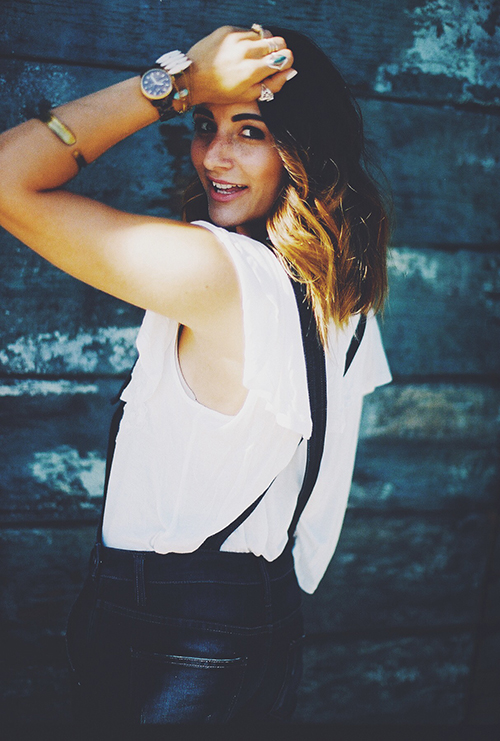


This picture makes me think I could rock the sandals with socks… or maybe it’s just the angle?

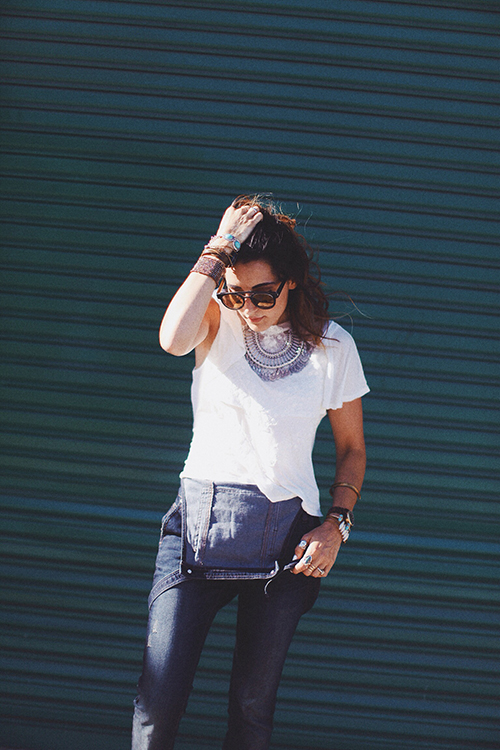

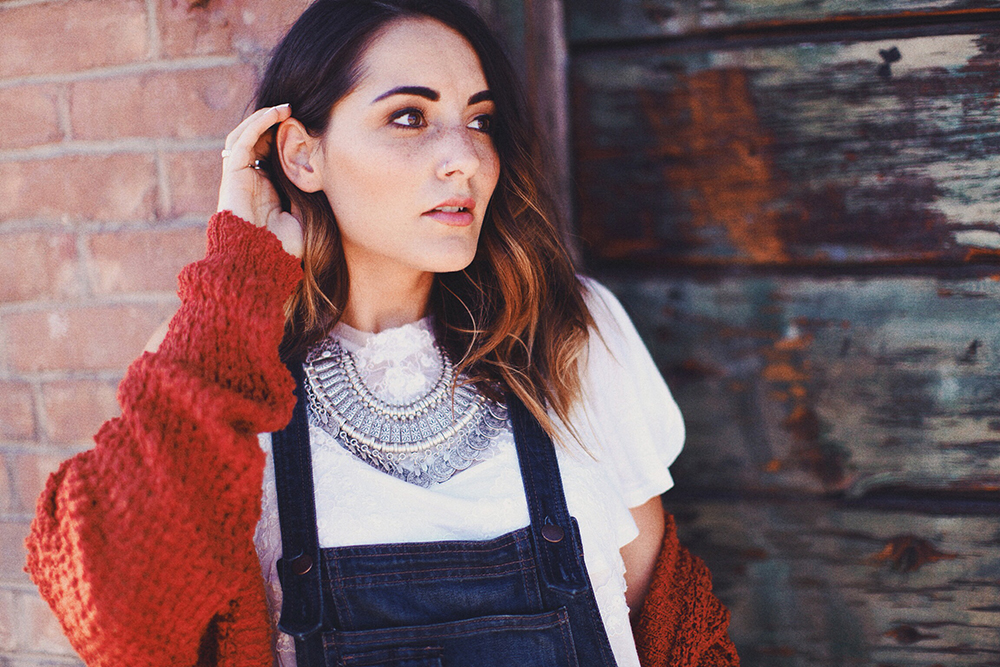


Overalls: Love this one and this one.
Sandal favs: sliver metallic, rose gold, and black.
Socks: Don’t knock it unless you try it
Necklace: St. Eve
Shirts I like: here, and here and here.
So what trend team are you on?… Read More
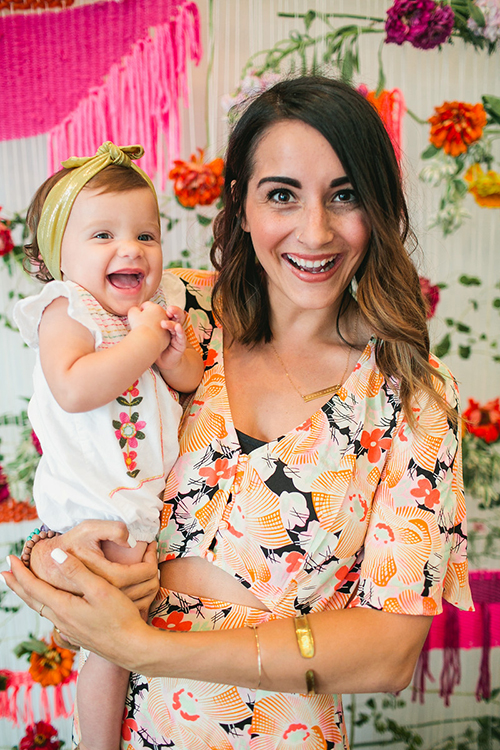
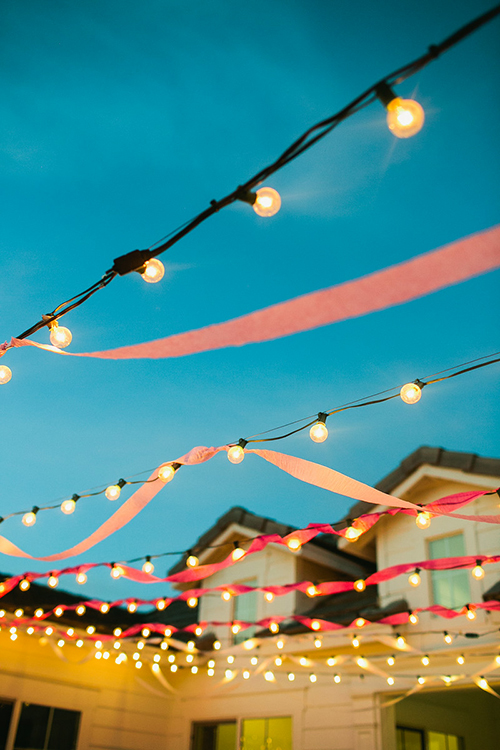
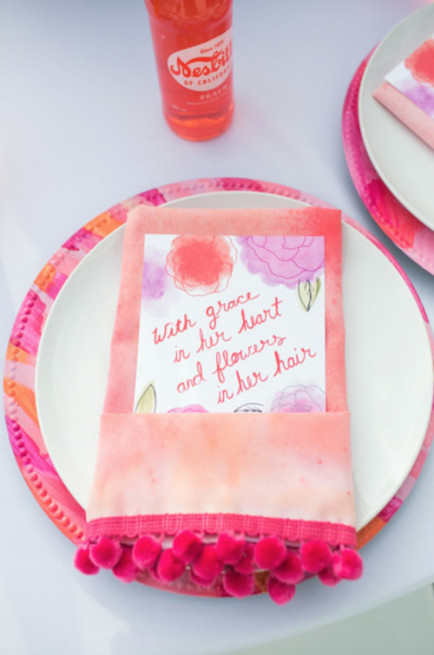
As a new parent, it is hard to believe that my little girl is already one! The saying “they grow up so fast” is seriously becoming my reality. It is thanks to a long list of people that her botanical first birthday party even happened. From the backdrop my sister-in-law and myself slaved over, to the 498 poms, sewn napkins, and day of set up, I owe a huge thanks to everyone who helped me out, and made her party what it was! So, thank you! It’s cause of you all that her fun party was featured on Grey Likes Baby– all captured gorgeously by Kayla Adams. Go on, and be inspired! (OH, and if you feel up to it there is a rather long, in depth, personal, and probably too drawn out blurb about Soph’s birth story at the end).
XO
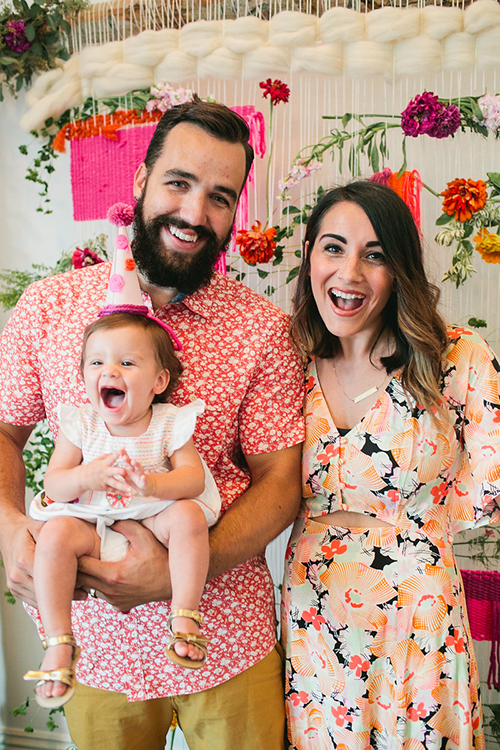
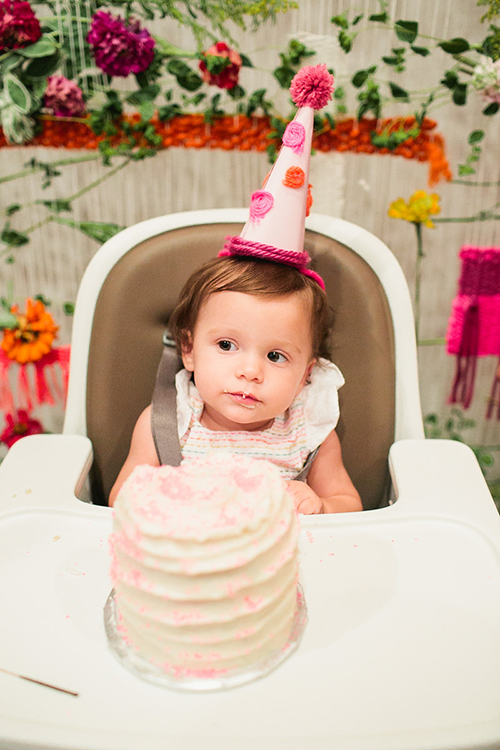
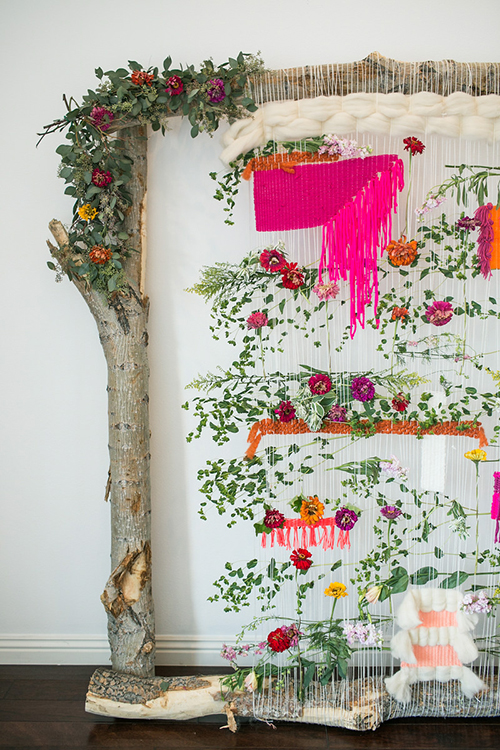
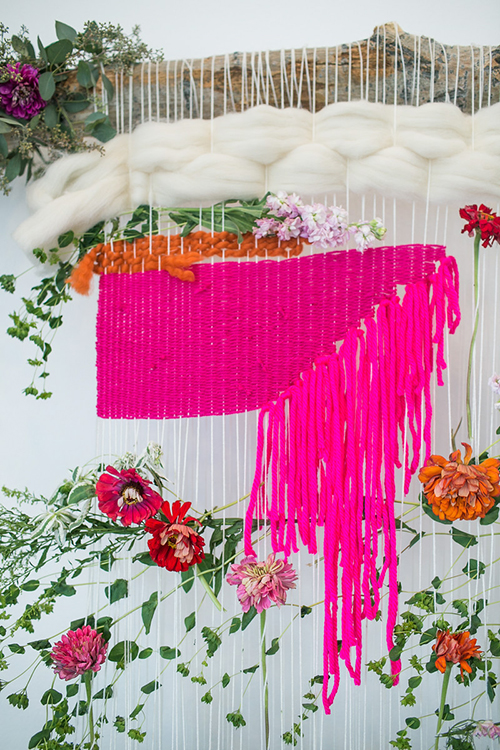

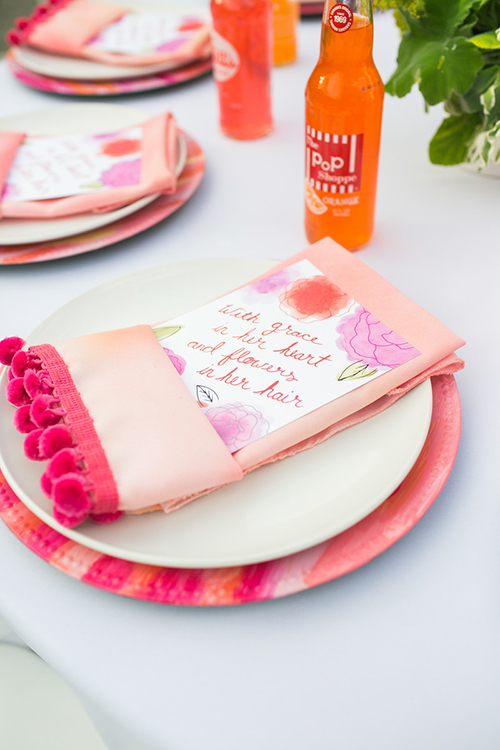
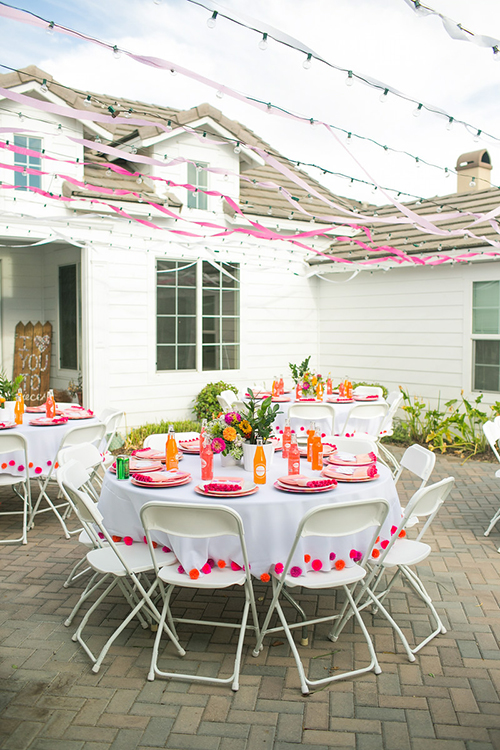


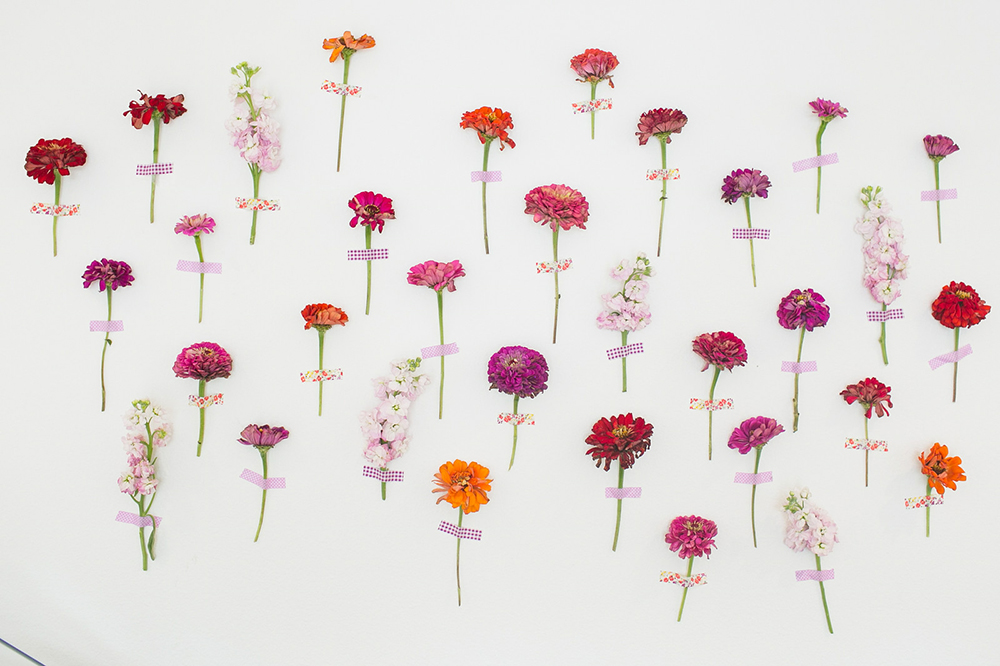


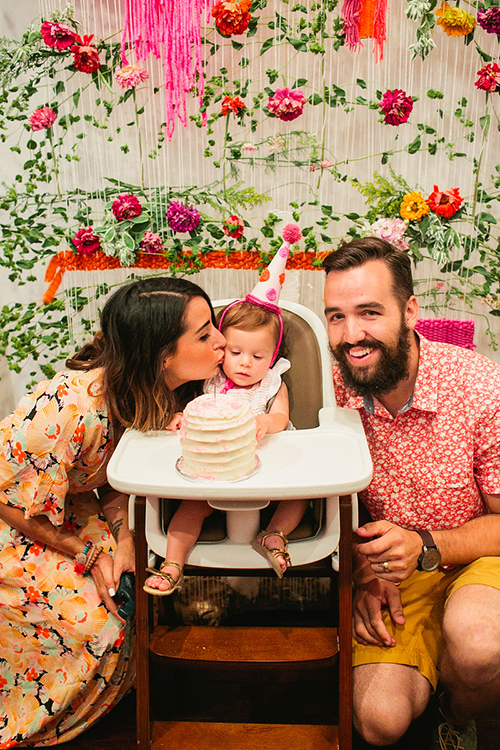


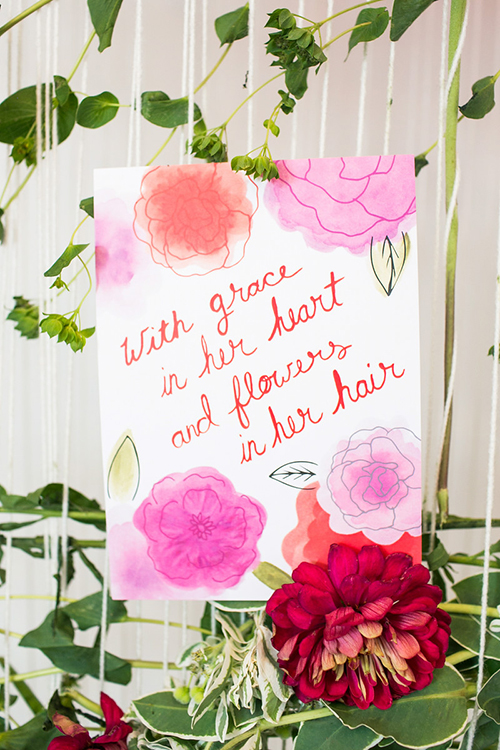


Photography: Kayla Adams | Cake: Jeanine Hardgrave | Floral Centerpieces: Lavenders Flowers | “Grace in her heart” prints: One Another Paper
In one year I cannot even begin to count the number of smiles, giggles, tears, and snuggles that I have been honored to share with my little girl. Truthfully, Allen and I didn’t set out with a plan to have her. I had plans. Big plans. My whole life I strived for academic success. During my undergrad I naturally assumed I would go on to my Masters, but God had other plans, better plans.
I thought it appropiate to tell her birth story. It was Friday July 10th, 2013. I had what I thought was a stomach ache for half the day. It was midnight, and I decided to run a bath. The water was warm; my stomach was tight. Allen came home to me siting in the bath. “I think I might be having contractions,” I said in an unsure tone. (He was out late doing the construction for Lift before we opened). I called the hospital to see what constitutes being in “real” labor. Since Soph was breach, they told me to come in. Yet, I still didn’t want too. I didn’t want to go in. I wasn’t really in labor, was I? Fast forward a couple hours, and I finally caved. I started packing my hospital bag. Yes, I hadn’t packed it yet because I was supposed to have a scheduled c-section that Monday. We headed to the hospital looking at each other, holding hands, giddy, and nervous, yet stuck in a cloud of surrealism. We joked about it being the last time we would be in the car together without having a little babe, but I still thought I would be the… Read More
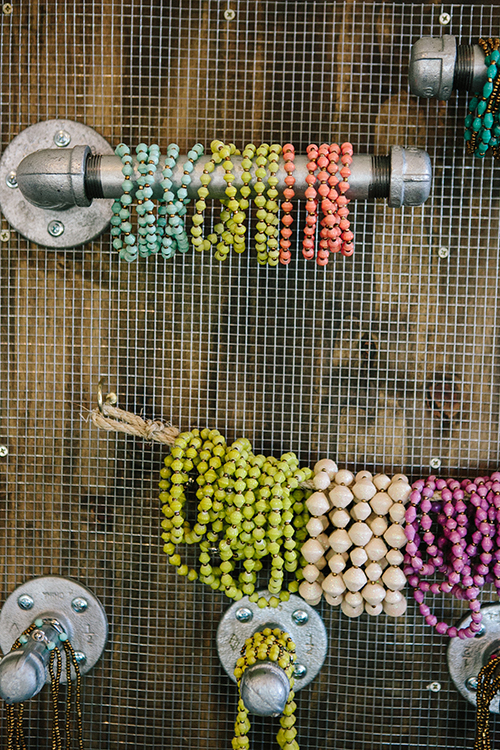
This jewelry holder is the coolest yet! It adds an industrial feel to your ordinary jewelry box, and it’s one you can easily customize to fit your needs. It may look like you’ll need a handy man around for this one, but we promise you won’t!

The goods:
A piece of wood (we used plywood and stained it in a Walnut finish, but any ol’ piece will do!)
Chicken wire
Screws
Screwdriver
2 hook screws
A piece of rope
2 1’ floor flanges
2 1’ end caps
2 1’ x 8′ metal pipe (nipple)
2 1′ elbow
4 1/2’ floor flanges
4 1/2’ end caps
4 1/2’ x 4’ metal pipe (nipple)
1. Cut and place chicken wire on your wood slab. With a screwdriver screw 4 screws along the sides of the wood to secure the wire- this is where you will hang your earrings!
2. Taking the 1’ floor flange (the flat piece), screw together the elbow piece, then the 1’ metal pipe, and top it off with the 1’ end cap! Easy right?! Repeat these steps 1 more time!
3. Allign both pieces so that the end caps are facing each other, and stagger them so one is slightly higher than the other.Taking your screws, adhere it to the wood in the allotted holes.
4. Next, take the screw hooks, and twist them into the wood under the metal pipes.
5. Tie a slipknot to adhere the rope to both sides of the hooks- we hung bracelets on ours, but you can also use them for rings!
6. Now, take the 1/2’ floor flange and screw in the 1/2 metal pipe, and top it with the 1/2’ metal cap. Repeat 3 times!
7. Screw the 4 pieces into the wood in a nice row.
(optional* you can hang your holder with a piece of rope stapled to the backside, or you can get picture hooks to hang from the back for a cleaner look).
8. Now start hanging your accessories!

>>Head over to my friends at 31 Bits to stock up your new holder and check out their new fall line!
Photography: Kayla Adams | Jewelry: 31 Bits … Read More
OK- this photoshoot screams summer fun, and is the ultimate guide for how to throw an ice cream social like one you’ve never seen! The gals over at Inspired By This featured this bad boy & I couldn’t be more excited! Kayla Adams works photo magic, and she did it again this time! This shoot was one where I thought, “I can’t believe I get to do this for work!” Once I thought of the idea it took on a life of its own, from the faux icecream to the cotton candy stuffed cones- there are def some pinworthy ideas to save for your next party! Oh, and not to mention the hand dyed, yarn wrapped rope installation complete with (you guessed it) poms, all draped off a custom built ice cream cart, (thanks to my talented husband who is a pro at welding and woodwork). I feel like I’m out of breath just typing all the details, and believe me I could go on! Take a look for yourself!


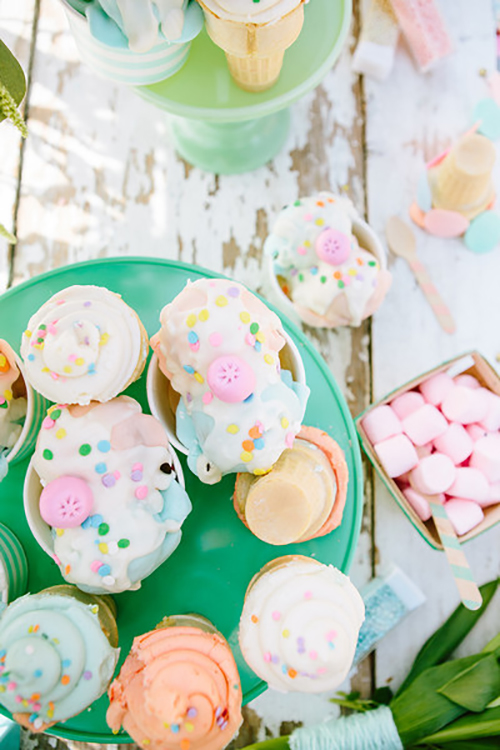
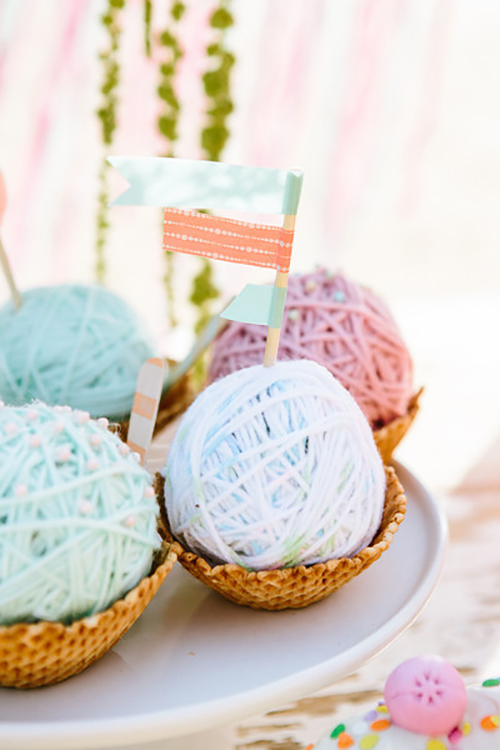
Was I right? Or was I right? How gorg were all the florals?! Janelle over at Lavenders Flowers is a master! In love with the cute models jewelry and outfits? Head over to the sweet girls at LUX for some pretty summer threads, and 31 BITS for those statement necklaces- they are the business!
XO
Photography: Kayla Adams | Creative Director/Designer/Stylist: The Shift Creative | Hair: Jordan McElyea | Makeup: Zaneta Pak & Liz Reyes |Florals: Lavenders Flowers | Jewelry: 31 BITS | Models: Ellie, Helena, & Sophia Hahn | Cupcake Ice Cream: Jeanine Hardgrave | Order Here sign: Nathaniel Hardgrave | Clothing: LUX clothing
… Read More
You guys are seriously going to love this DIY! It is an easy fix to your ordinary napkin, and you can customize it for any event!
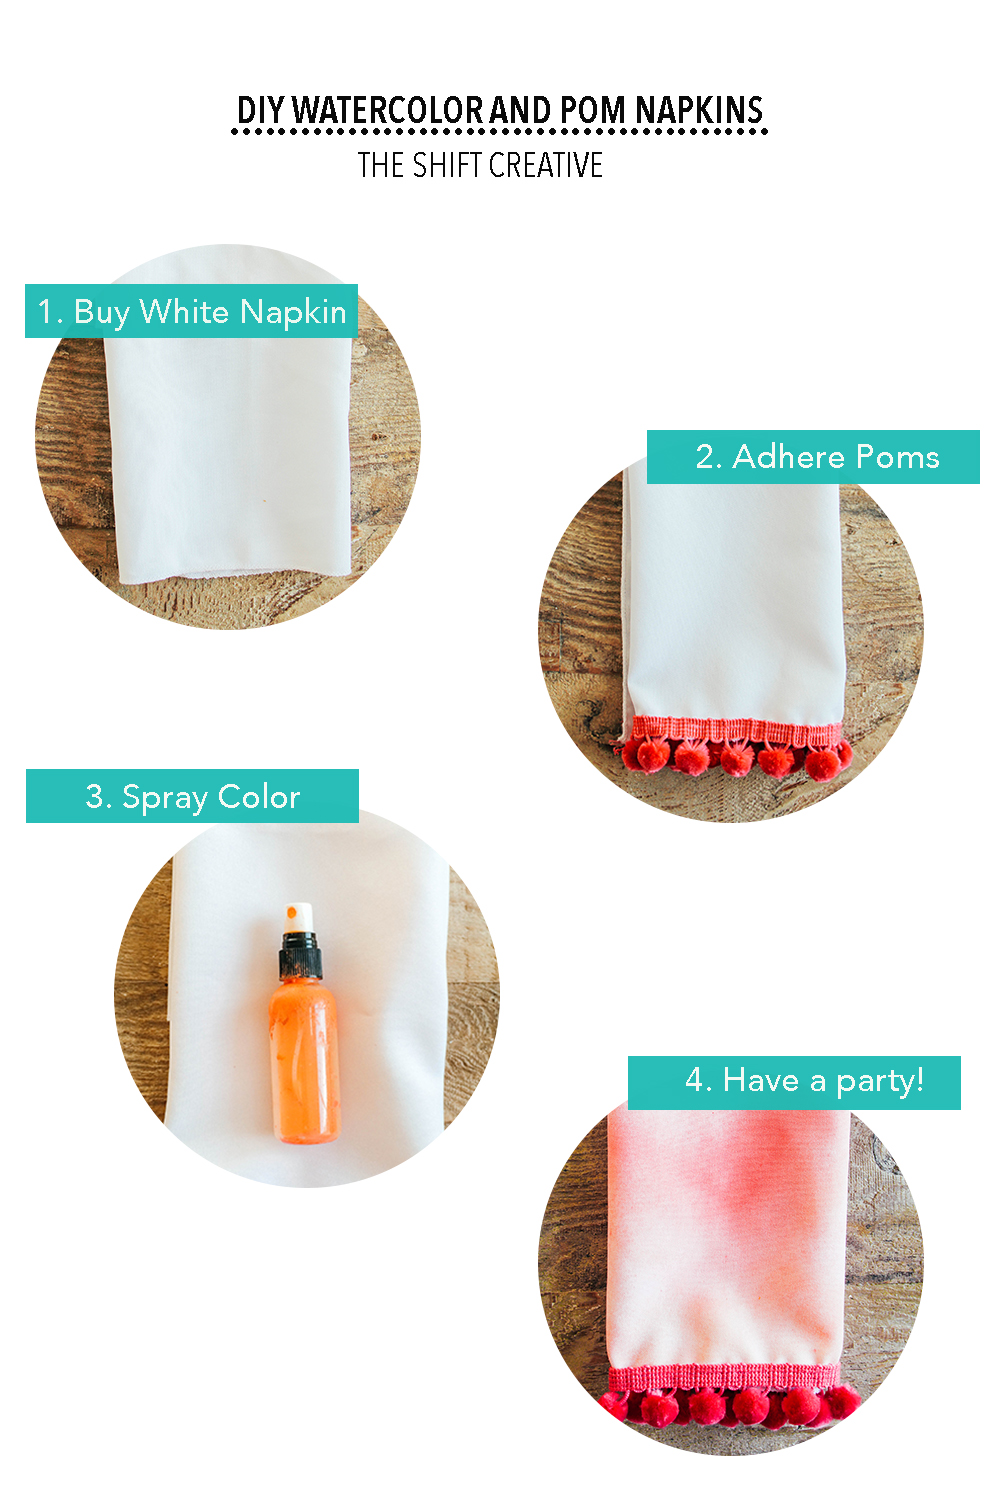
I bought my white napkins down in the fabric district in LA because I needed a bunch for my daughters birthday party, but you can easily take a trip to Target or IKEA to find some. Next, go get a pom pom garland at your local craft store (they come in so many colors so have fun with it).

-To adere the poms there are a couple different options:
1. Sew a single stitch using your sewing machine 2. Do it the good ol’ fashion way with a needle and thread 3. Hot glue them to the rim of the napkin
And VOILIA- already so much cuter! You can stop there if you want, but I wouldn’t! This next part completely revamps your ordinary napkin into a focal point at your next event!
Next, I took two spray bottles, and filled them 3/4 with water. Then I took paint that fit into my color palette (again, use whatever colors fit your party), and in one bottle I put about 10 drops of my coral paint and shook it up really good. I did the same in the other bottle, but this time used orange. *I would recommend using a larger bottle as my paint clogged the nozzle. Also, remember that the more paint you add to the water the brighter it will be! Fabric paint or acrylic paint both work great!
This is where the fun starts- I alternatively sprayed my napkin with both colors, and allowed them to merge together to create the watercolor effect! There is no right or wrong way to do this! Some spots will be more vibrant and others will merge together to create a different color! The more natural it looks the better!

I LOVE the way these turned out, and will be defintely creating more for other events and holidays! Tell me how yours turn out!
XO
These pom pom coasters are a great addition to any drink, dessert, or anything that fits on a coaster! Yea, those coasters you got for Christmas that you were going to regift, you can go ahead and keep them now. Thank me later.

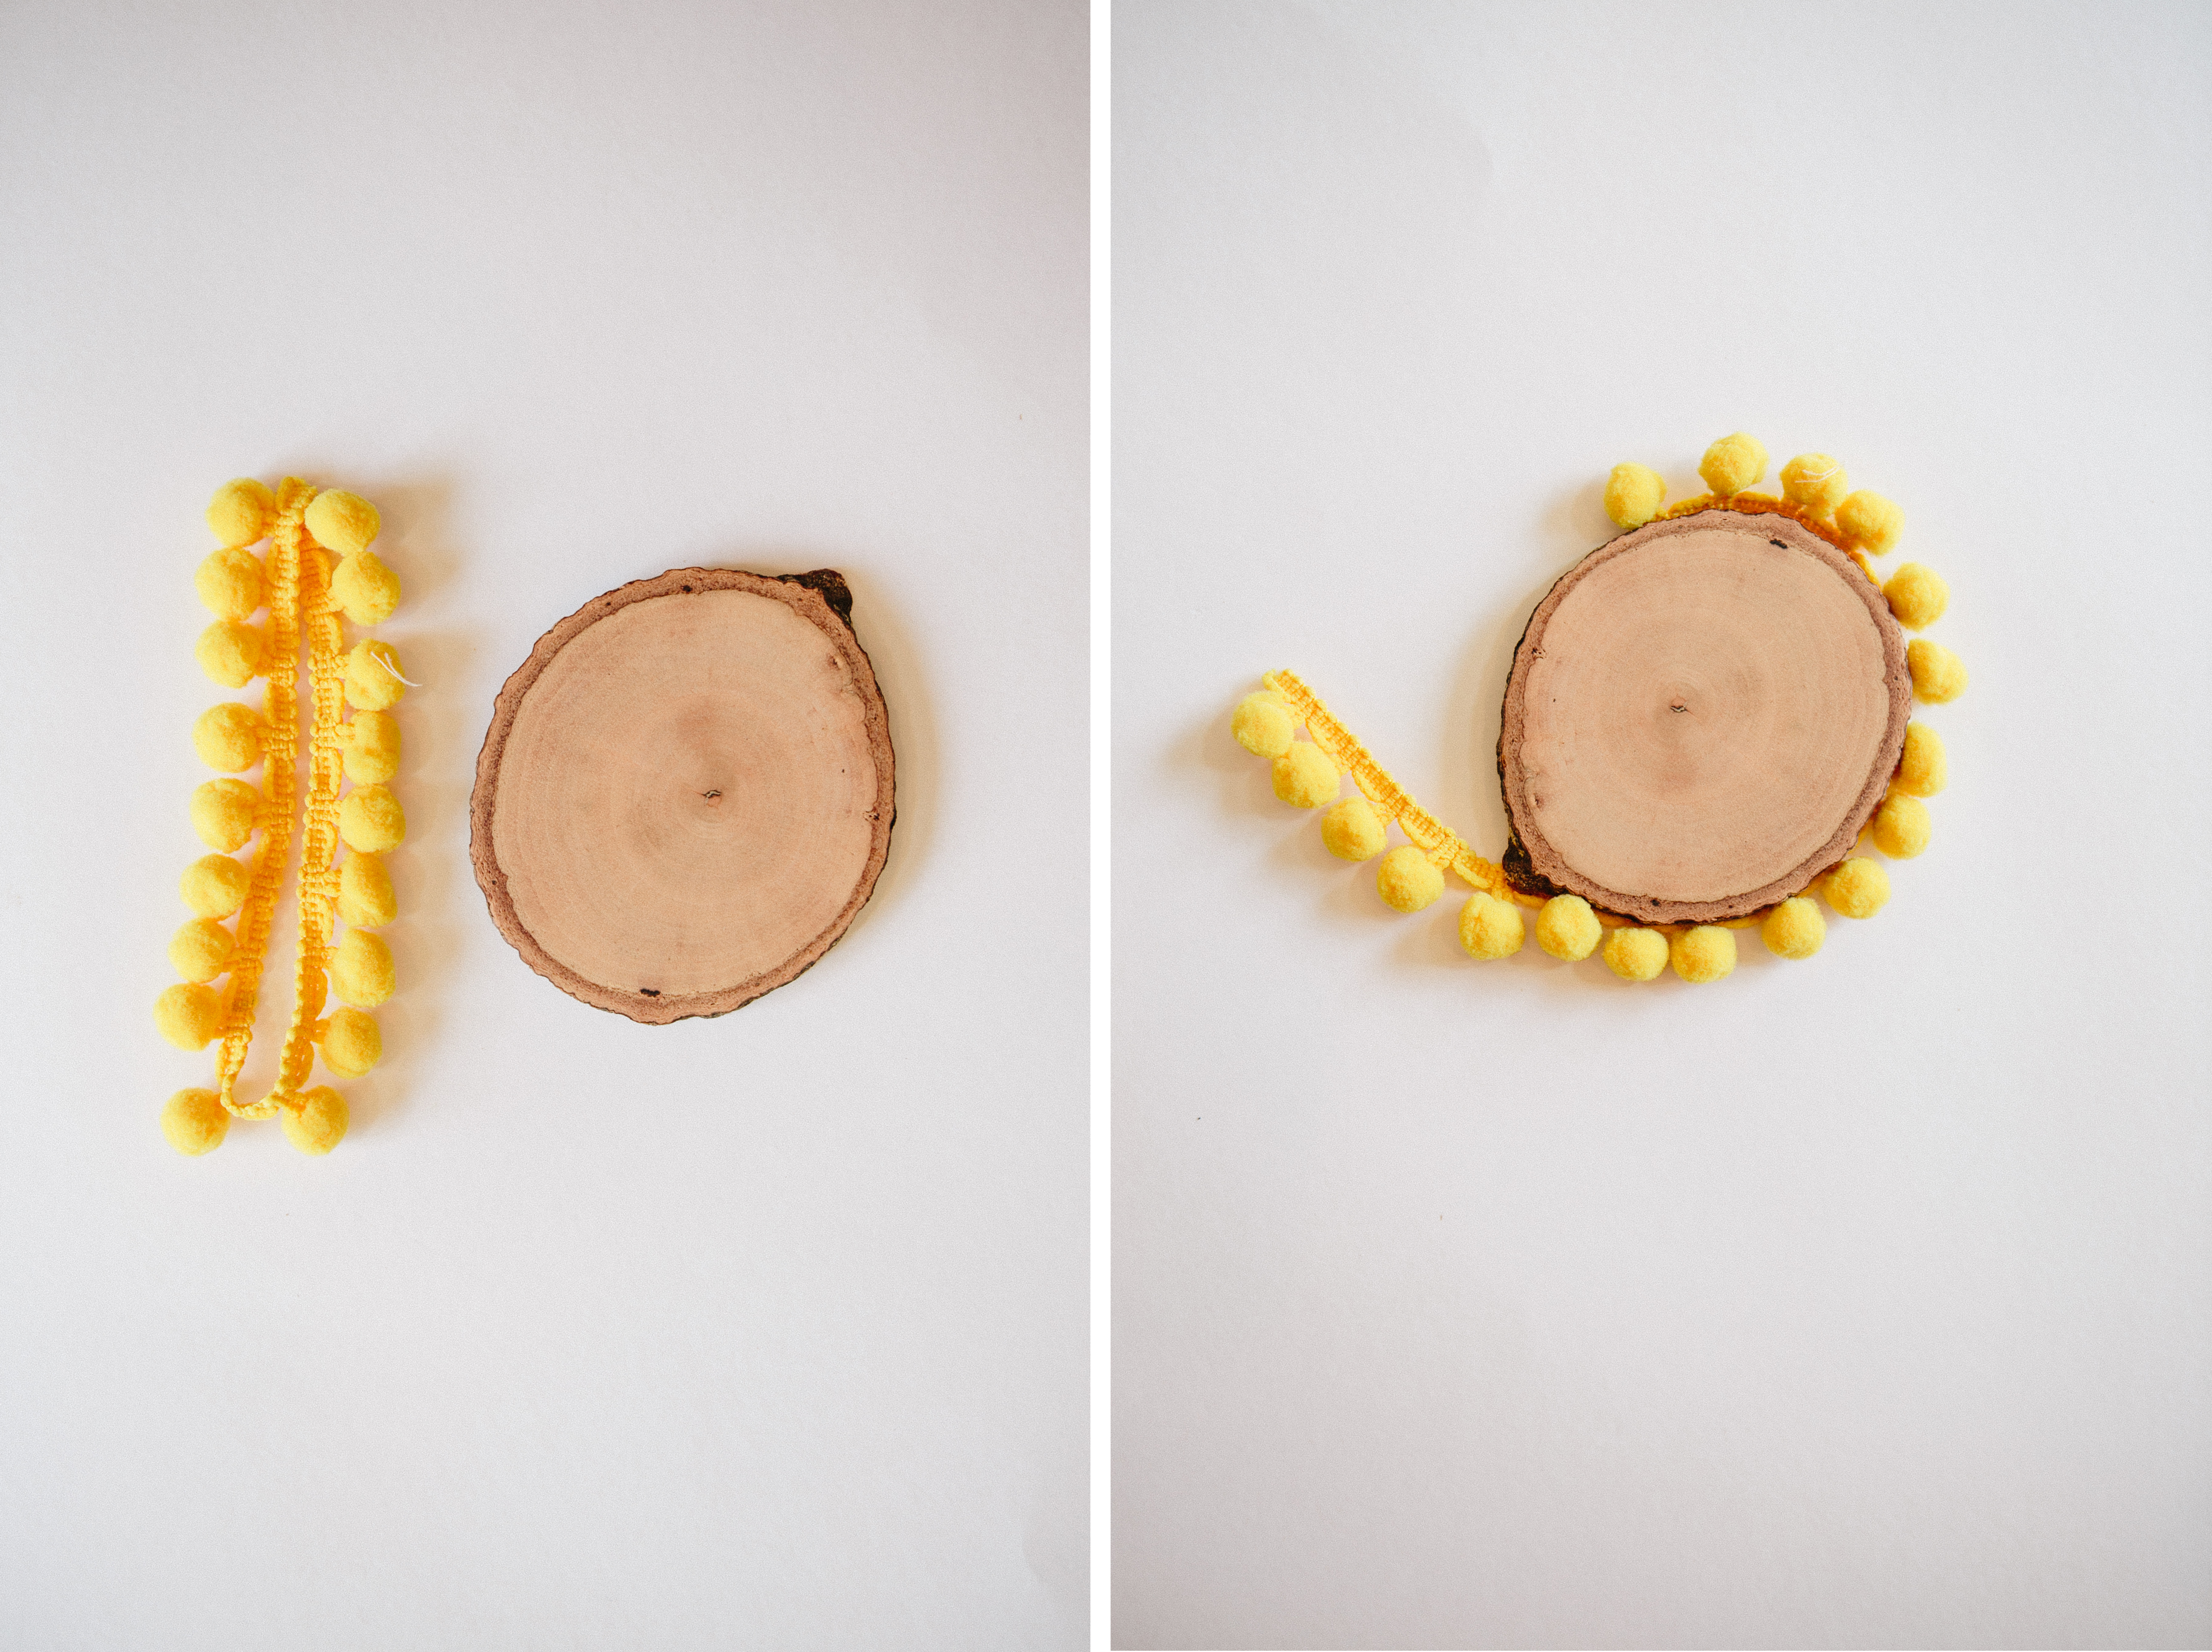
All you have to do is use any old coaster, (I used these), measure your pom garland (Joanns got your back), and hot glue around the rim of the coaster, and TADA!
![DIY POM POM COASTERS]()


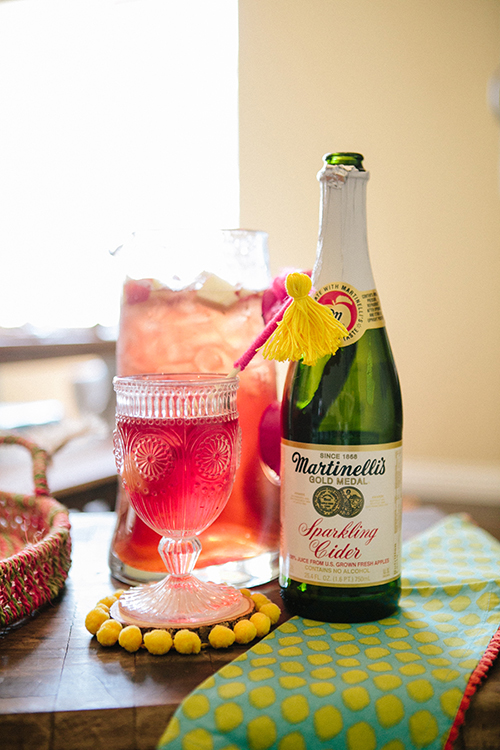
Seriously. So easy. So cute. So affordable. And may more adjectives that I can put so before.
I made these for a fun 31BITS House Party inspiration. Head over to their blog to learn more, and to add some fun jewels to your summer wardrobe!
Xo
Photography: Kayla Adams Jewelry: 31 Bits… Read More
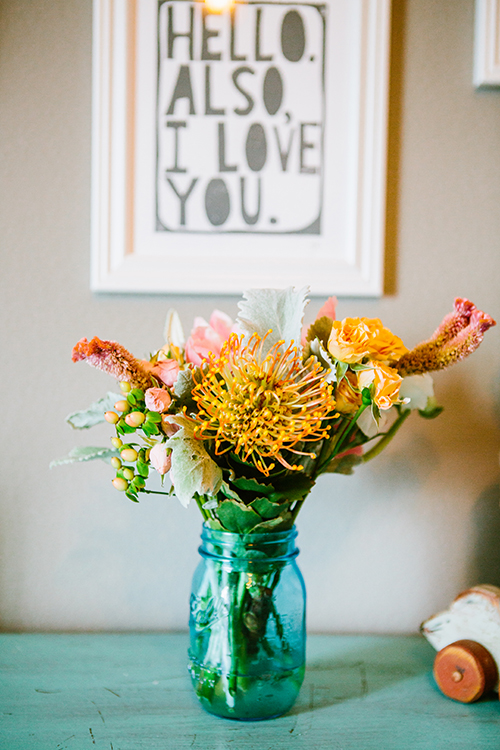
I thought I’d do a little TBT of Sophia’s nursery since she turned 1 two weeks ago I’m feeling a little reminiscent. It was featured on Grey likes Baby even before The Shift Creative was born, (or Soph was for that matter) and captured gorgeously by Kayla Adams. I remember how hard it was for me to choose all the pieces in her room because I wanted it to be perfect, and to be completely done before she was here. Mint and peach were trendy then and still are now, but I don’t tire of it yet. I love how fresh her room feels with the grey and white accents and all the fun, quirky details that I found on early mornings to yard sales and flea markets. I will say that now her diapers aren’t so perfectly in place, the rug is a little dirtier, and clothes litter the room, but nonetheless its hers. She will grow up in there and make memories in there, even if the paint colors change, the bed transitions, and the prints are replaced by posters- it will always be the room I made for her to call her own!
Take a peek!
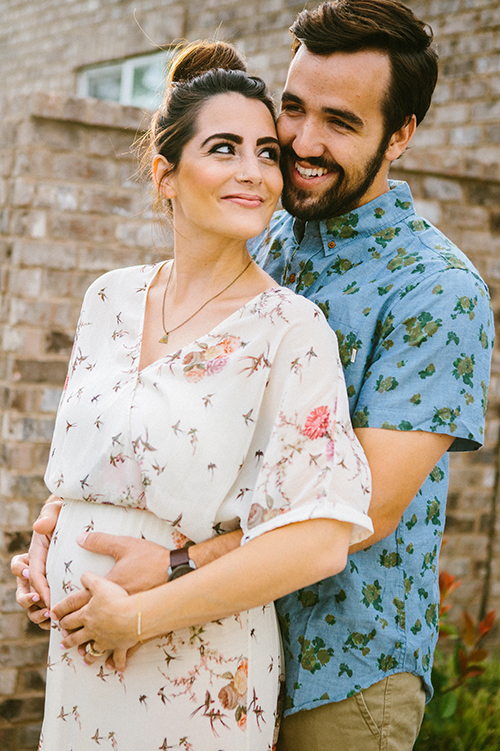
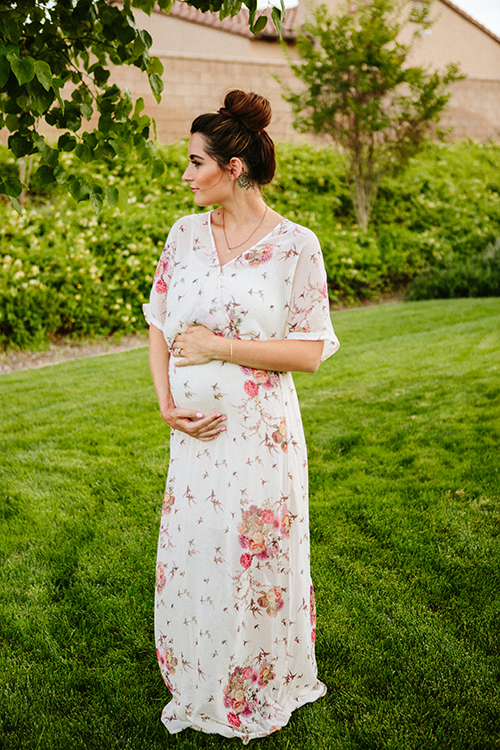
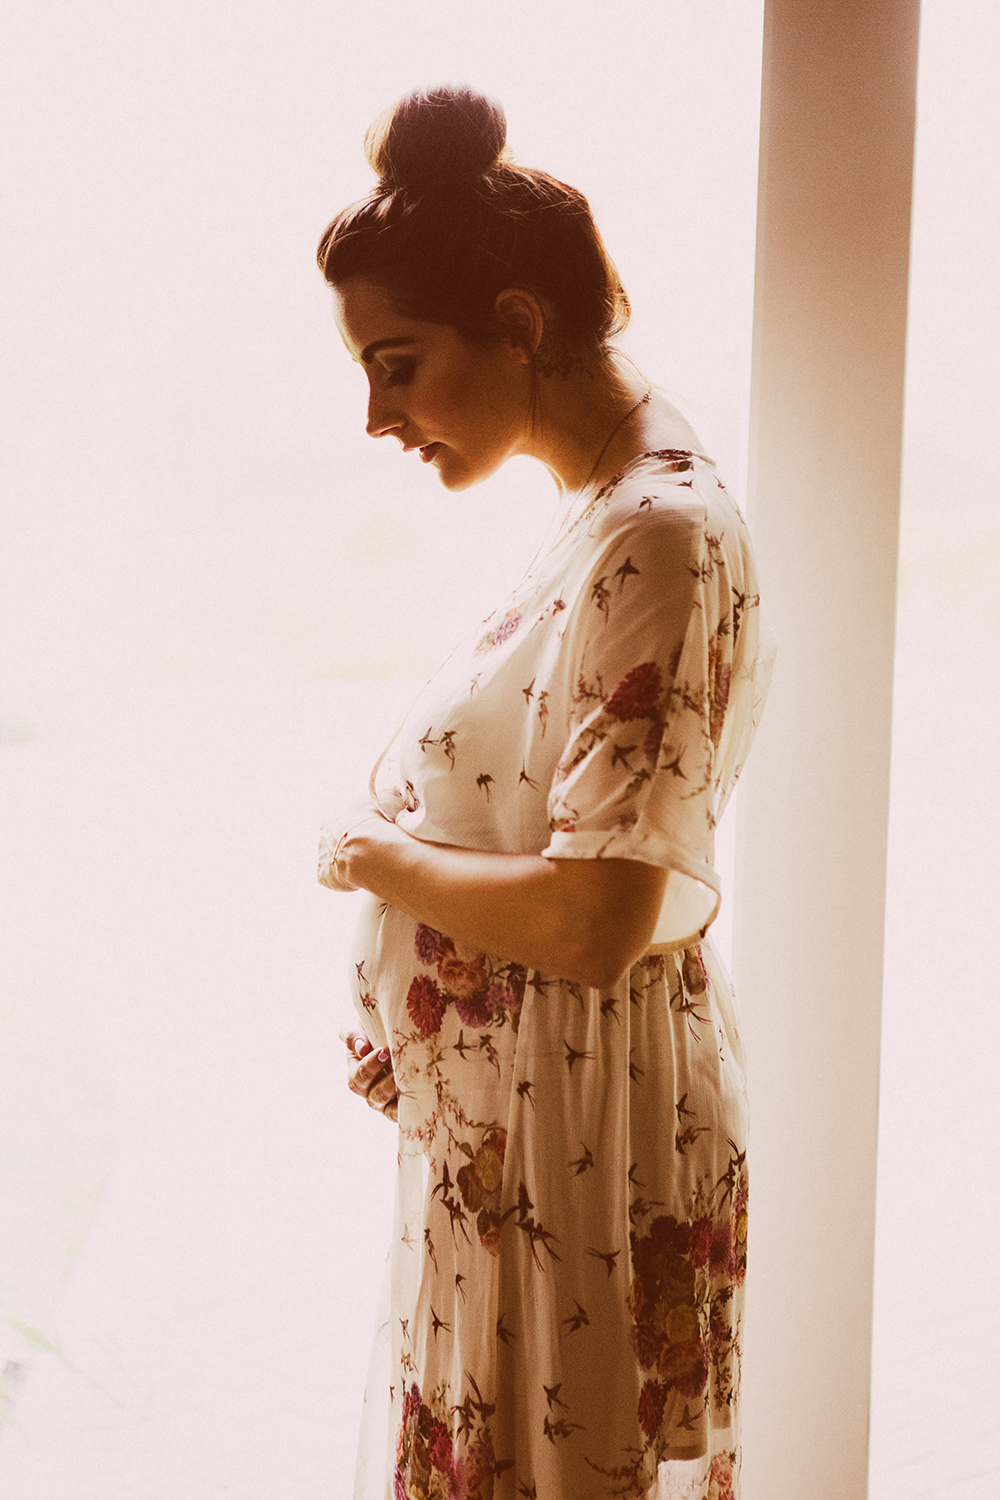
P.S- I included some maternity shots too, the reminiscing continues…
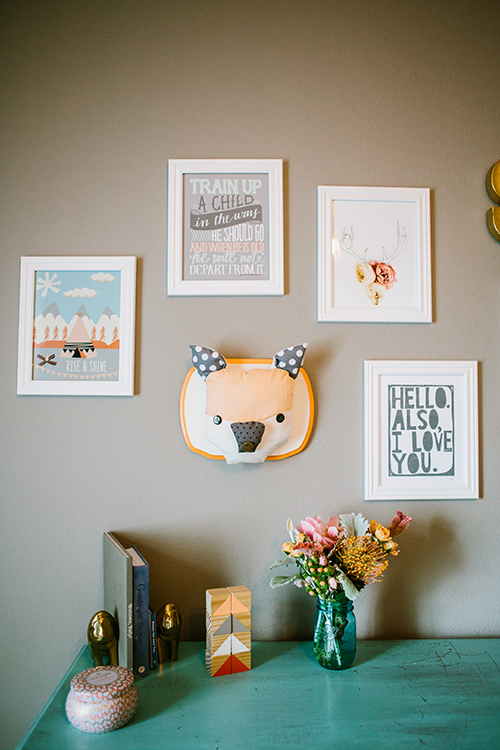

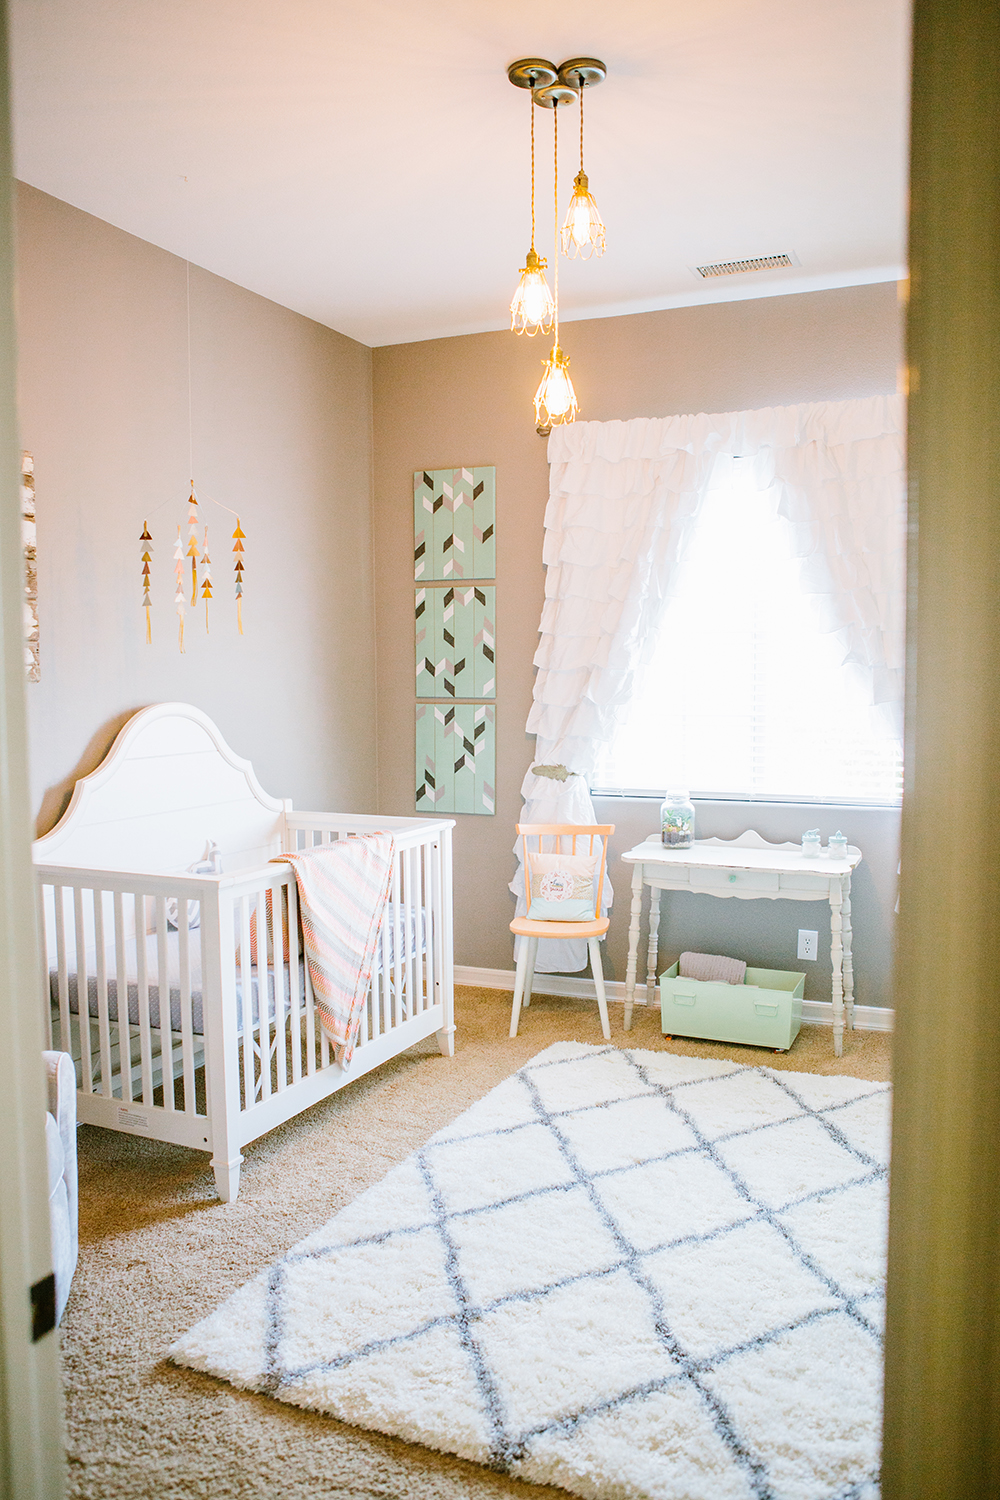
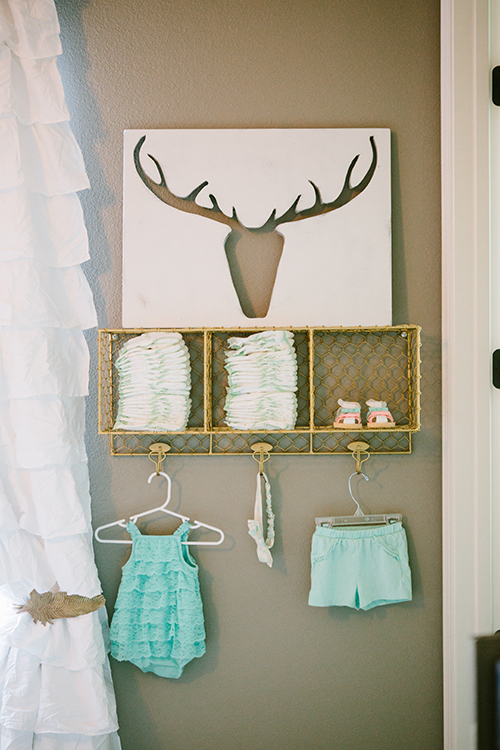

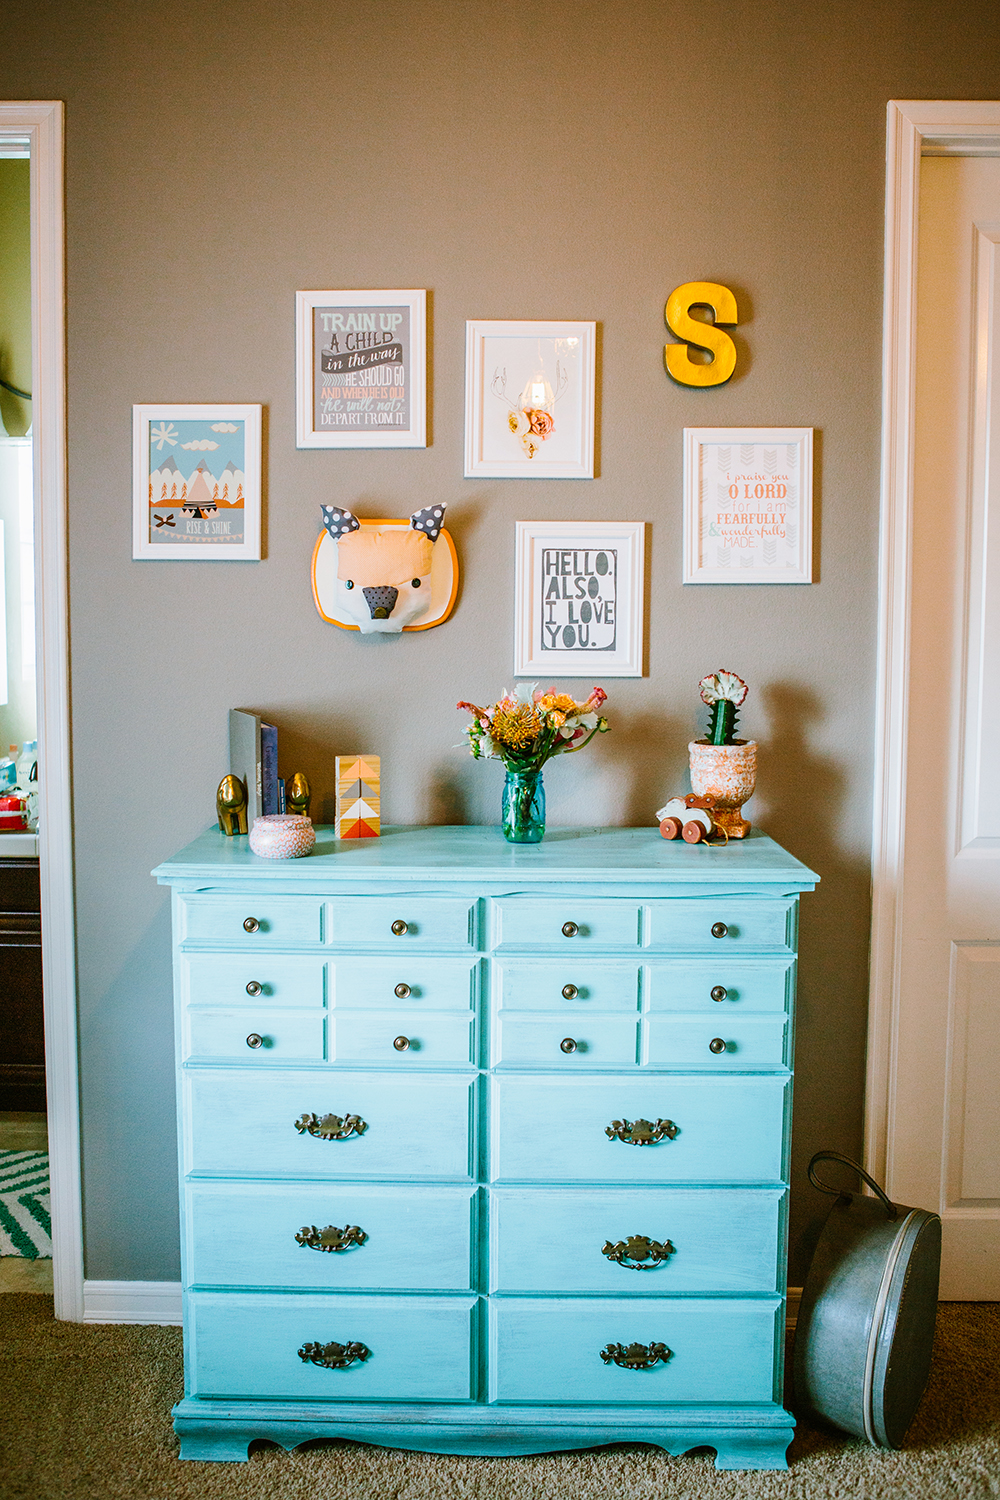
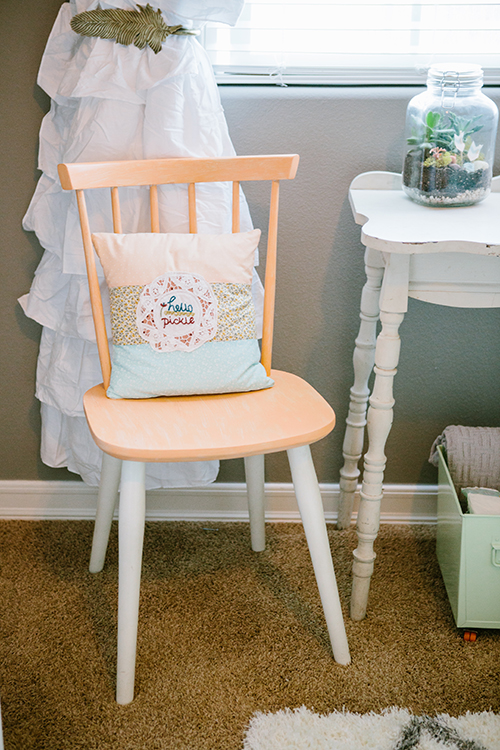


Photography: Kayla Adams | Design: The Shift Creative | Crib: Restoration Hardware Baby | Dresser: Rose Bowl | Triangle Mobil: The Alison Show | Rug: Rugs USA | Sophia Sign: Custom @traderjacq | Curtains: Pottery Barn | Rocking Chair: Babies R’ Us … Read More
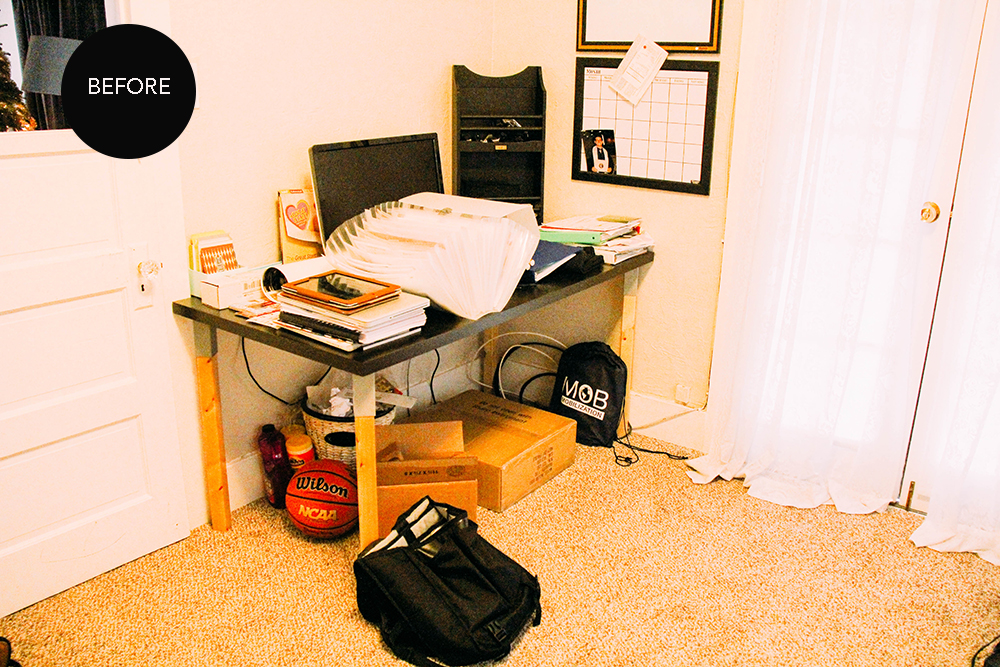
I love this room for many reasons, but I guess I’ll just name two. First, because the couple I designed it for are super awesome and let me take over their space, yet still staying true to their vision. Second, because the wife is the one who really encouraged me to start a blog to begin with, so hats go off to her!


Talk about a transformation! For under $1500 I redesigned this whole room from drab storage room, to industrial office and cozy guest room! My friends wanted an environment for a study, while staying warm for a guest room. The white bedding and sheet set from West Elm really brighten up the room, and look great paired with the Moroccan rug from Rugs USA, giving the room that homey vibe they wanted!

This bookshelf from The House of Industry was a steal & is def a focal point of the room!
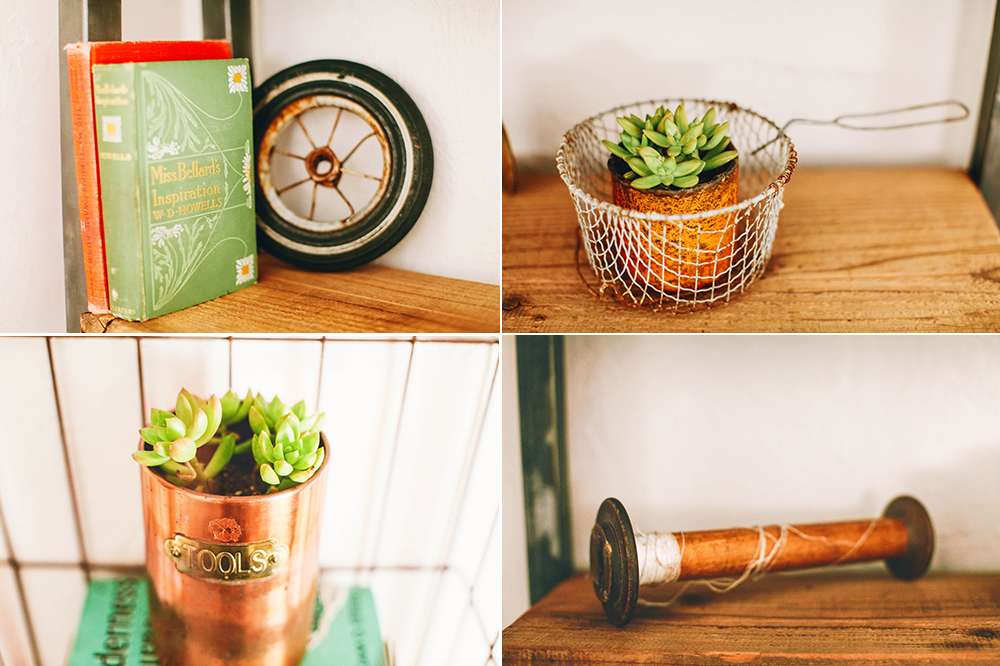

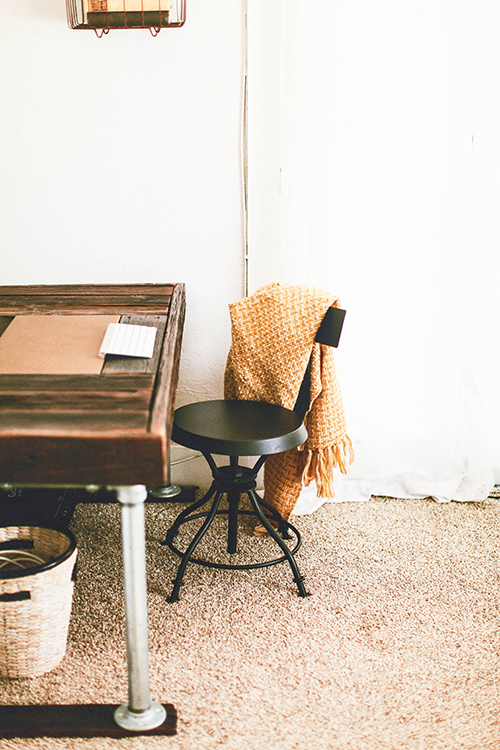

Let’s talk about this desk! My talented husband custom built it for this room, and I’d say it was the perfect touch! Thick slices of wood, industrial piping, leather accents, and a west elm table lamp on top all create a perfect work space!


Don’t let your budget discourage you from making your space look awesome! It is amazing what you can do with a small space, and an even smaller budget!!… Read More
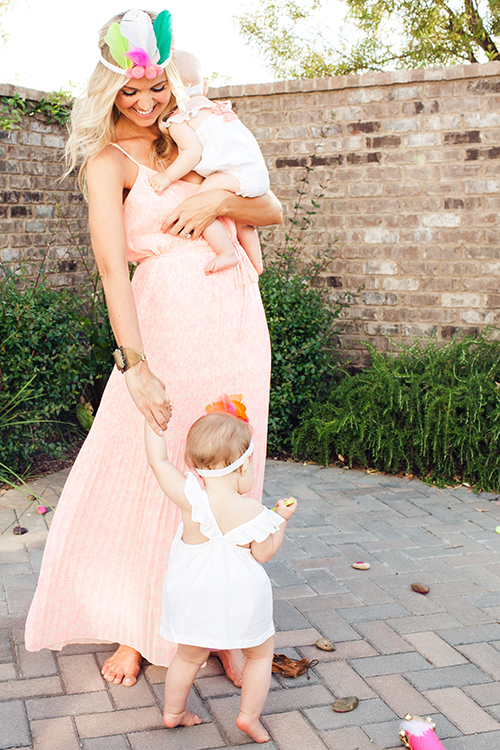
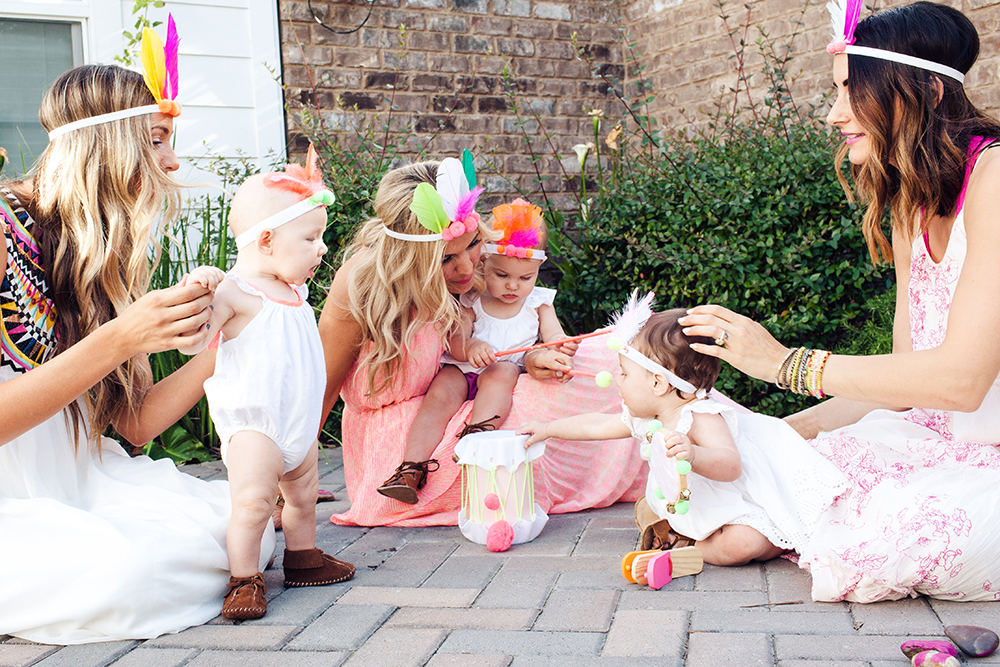
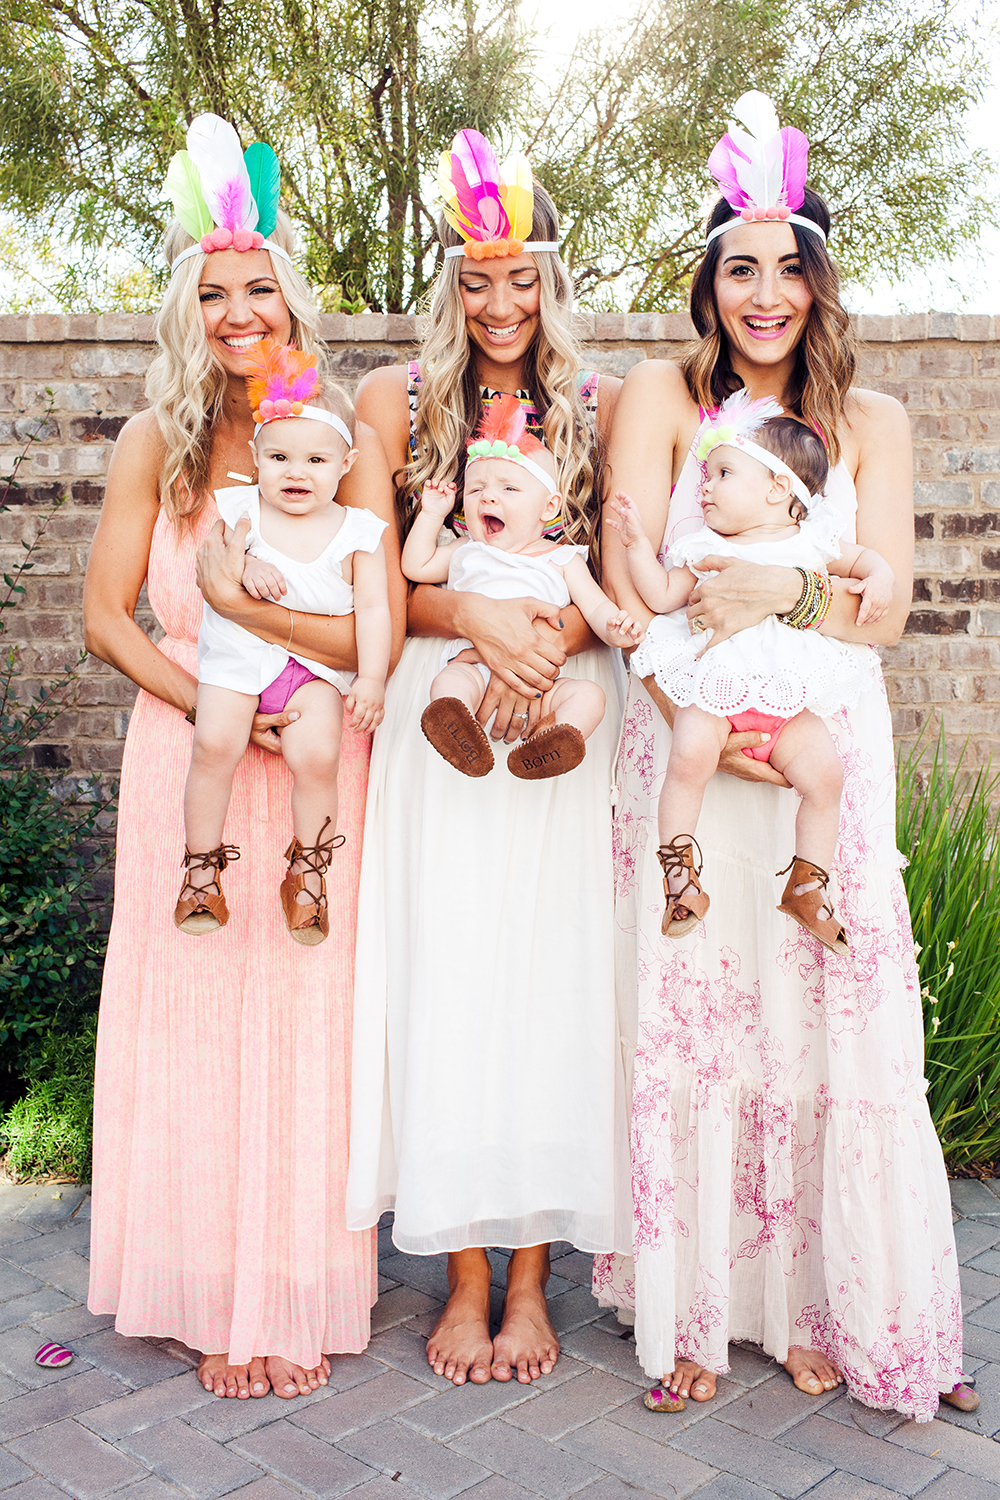
From the neon color palette to the subtle tribal vibe, this brunch was so much fun! I got to be in front of the camera with some of my best friends and our littles to honor the thick bond between mamma and babe. Monique Taylor captured the day beautifully, and put up with three crazy babies, and even crazier mammas!!


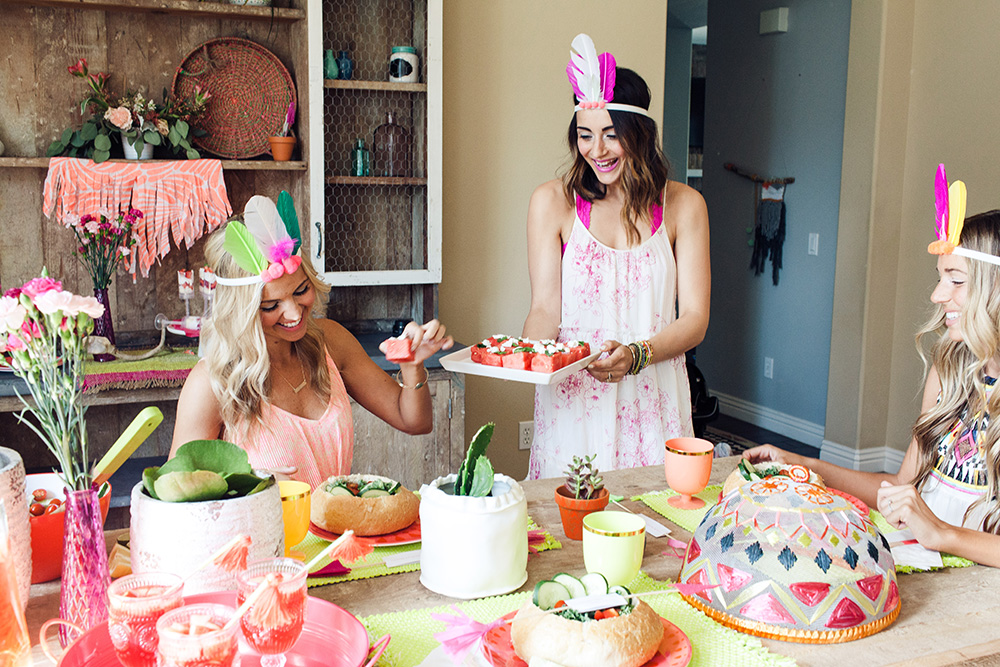
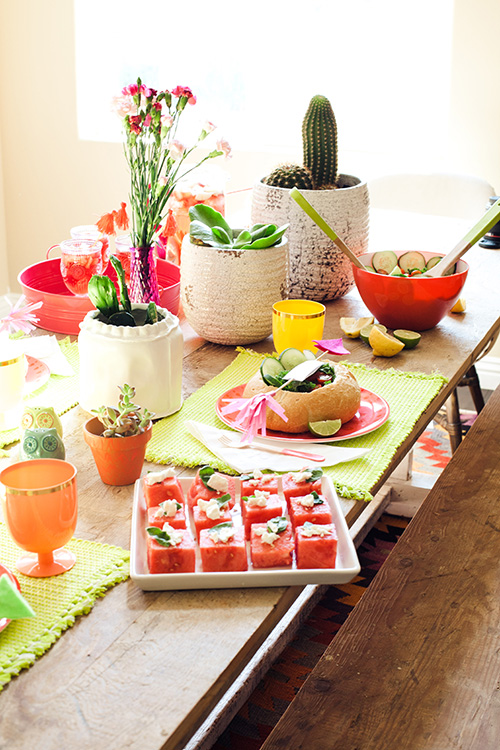
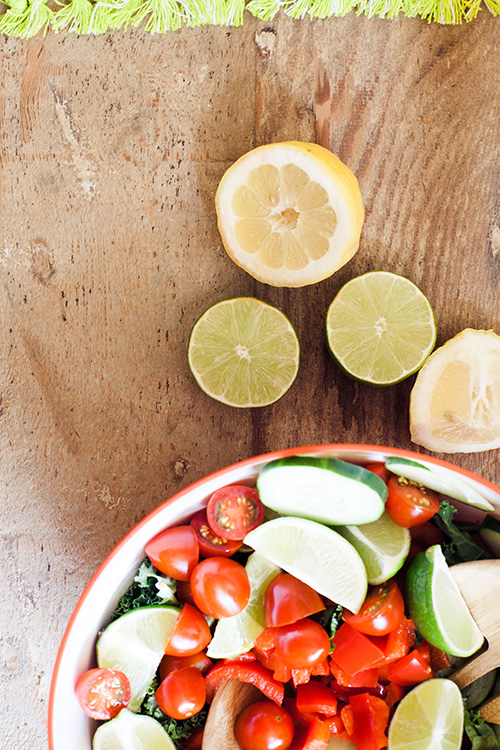
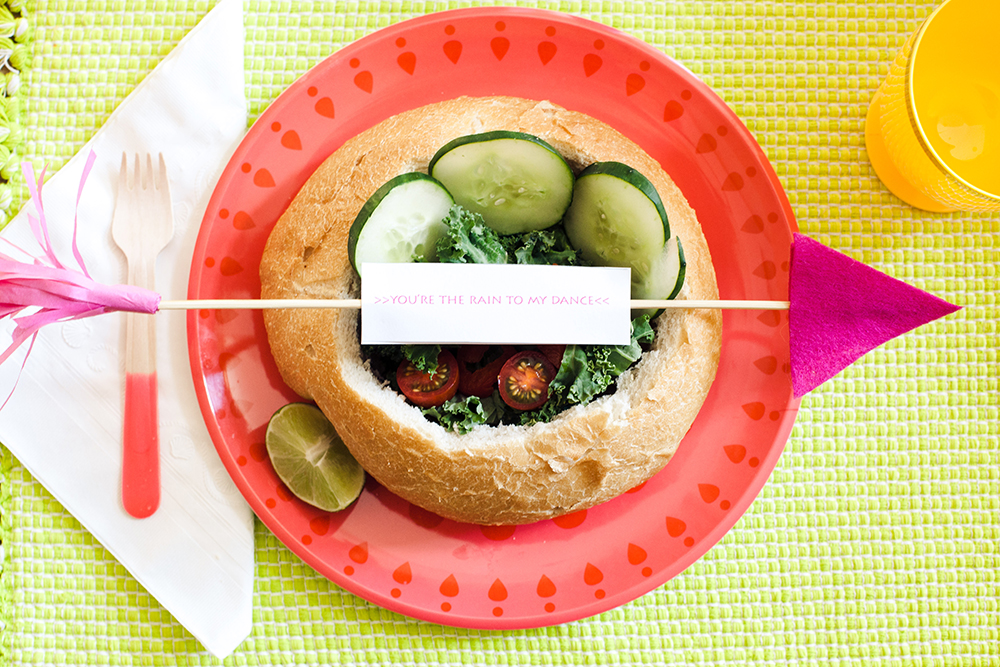
Watermelon topped with goat cheese and basil was prepared for the appetizers, salads served in bread bowls, and strawberry shortcake in push pops for dessert! Seriously, yum!
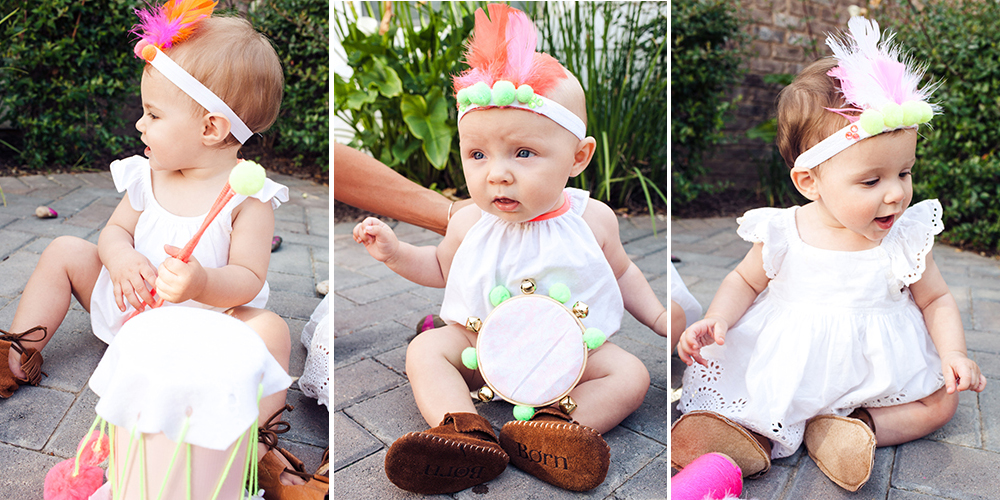


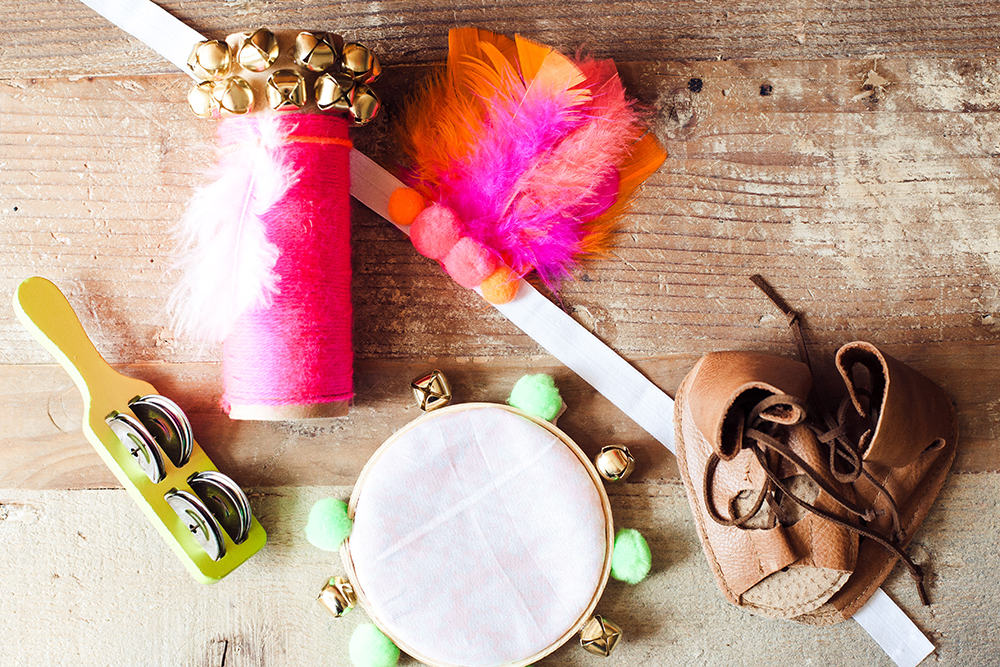
These DIY instruments added the perfect playful charm, although to be honest they were more for looks than practicality.
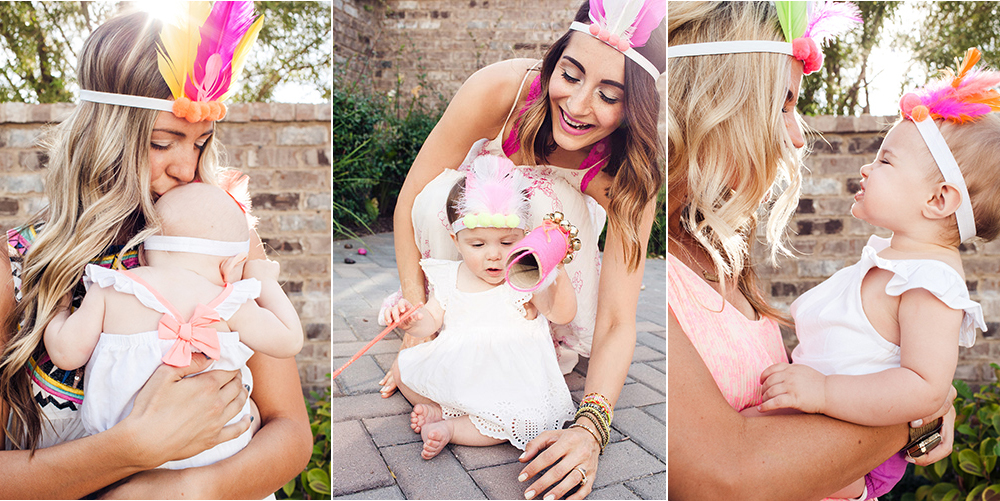
While we made these feather crowns for the shoot as something sweet to wear, imagine the educational aspect that can be conveyed to our littles regarding the Native American culture and history.


As a new mom I understand how hard it can be to grab dinner with friends. There are many times I think, “I want just a day to myself,” with no “mamma, mamma, mamma” whines, pulling on my leg or hair, unloading and loading the car with all things baby, feeding, changing, and the list goes on. Yet, even when I have those couple hours to myself I find myself looking in the rearview mirror for my little one, waiting to hear her soft babbles, to see her sweet smiles, and to receive her sloppy kisses. Sometimes I get lost in the to-do lists, and don’t take the time to soak up her gentle and quiet spirit, her curious nature, her giggles, and even her whines- all of which remind me of her dependence on me. She needs me. Wow, what a privilege it is to be a mom. I never thought I would enjoy it as much as I do, and I wouldn’t change it for anything! Loved this day, and love these people. Hope you dig it as much as I do!! XO!… Read More


